OE: There are two different styles used in the range
of 2.3 's. The early style has the interface between the upper
and lower in a row, the later in a square. According to Rick Byrnes
they both have the same flow.
Aftermarket: None
Intake Manifold Leak: The lower intake to head gasket is prone to leaking with anything other than a Felpro gasket. This gasket is blue in color and has 3 layers. It is part of a set which is available for about $10. Felpro 90266-1. If you have unstable idle and have tried everything else, get the gasket and plan on a day to change it and port the intakes while you're there. Another idea is to buy a ported upper and lower and only spend a few hours R&R'ing them.
Modifications: Both are pretty good designs, but as with any
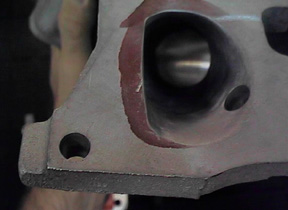
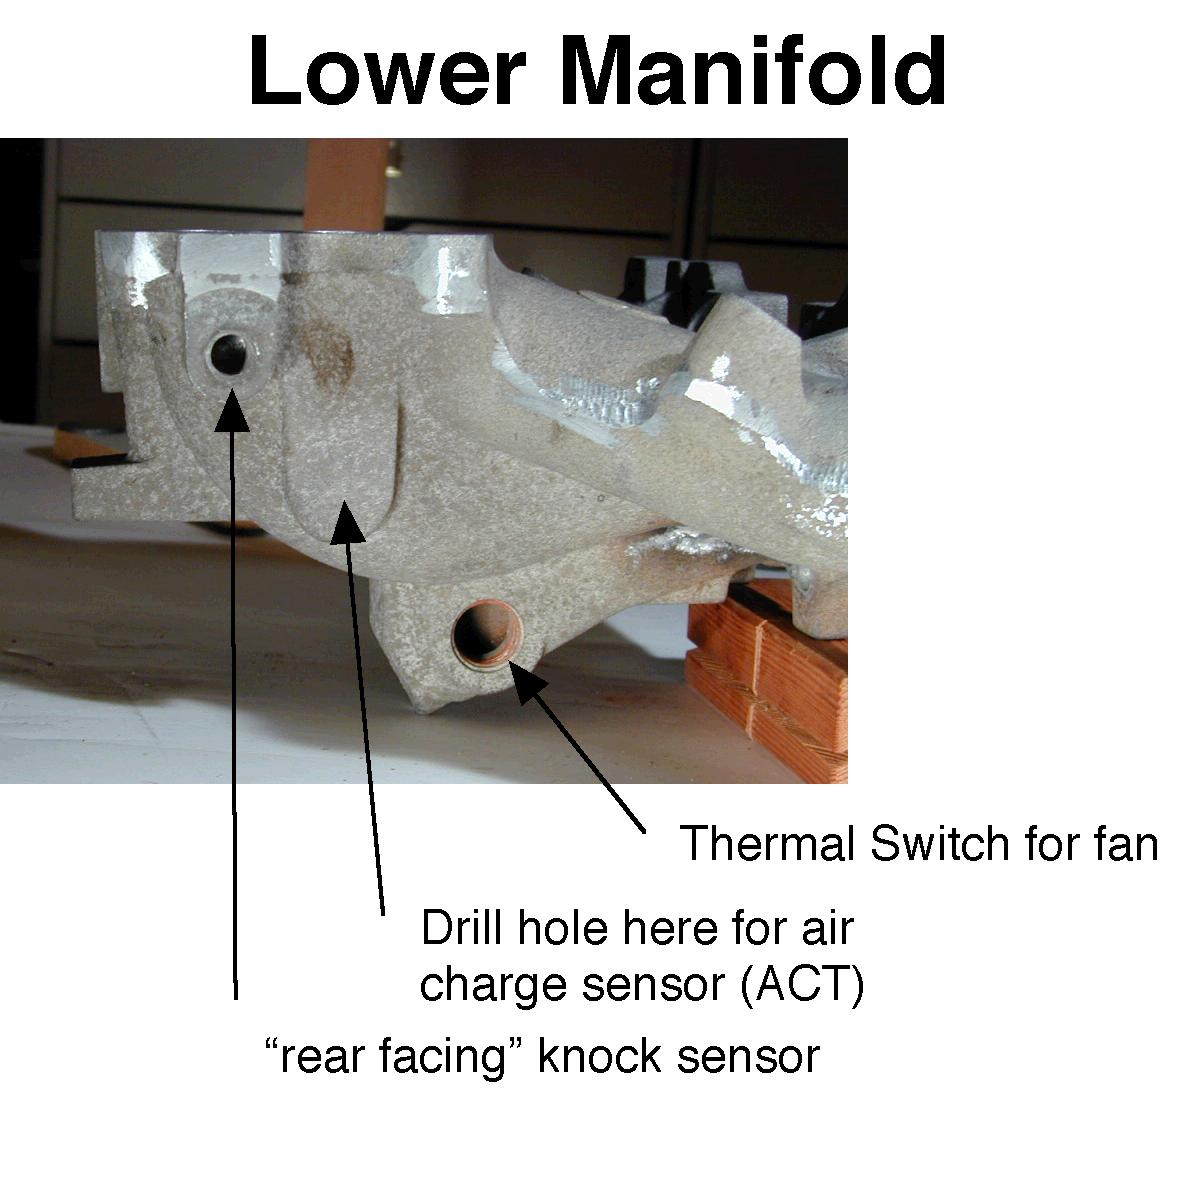
part a little porting can help. On the lower manifold in the center
runners (#2, #3) there is a restriction about 4" in from
the head flange. Completely opening up the upper manifold so it
is a single plenum with a corresponding radius on the inlet side
of the lower manifold shows an increase in high RPM power (and
a slight decrease in low RPM torque). It is a long proven fact
that supercharged engines react better to a box style as opposed
to a long runner intake. The box creates a larger volume of air
in the plenum for the cylinders to draw from without losing the
pressure or speed of the air passing through the intake. The shorter
the passage to the cylinder the better. This will make low end
torque a little slow but is more than made up for on the top.
Other: The OE intake (to head) gasket is proven to develop
a "vacuum leak" over time. The FelPro replacement is
the best part and is available seperately or included in all their
sets.
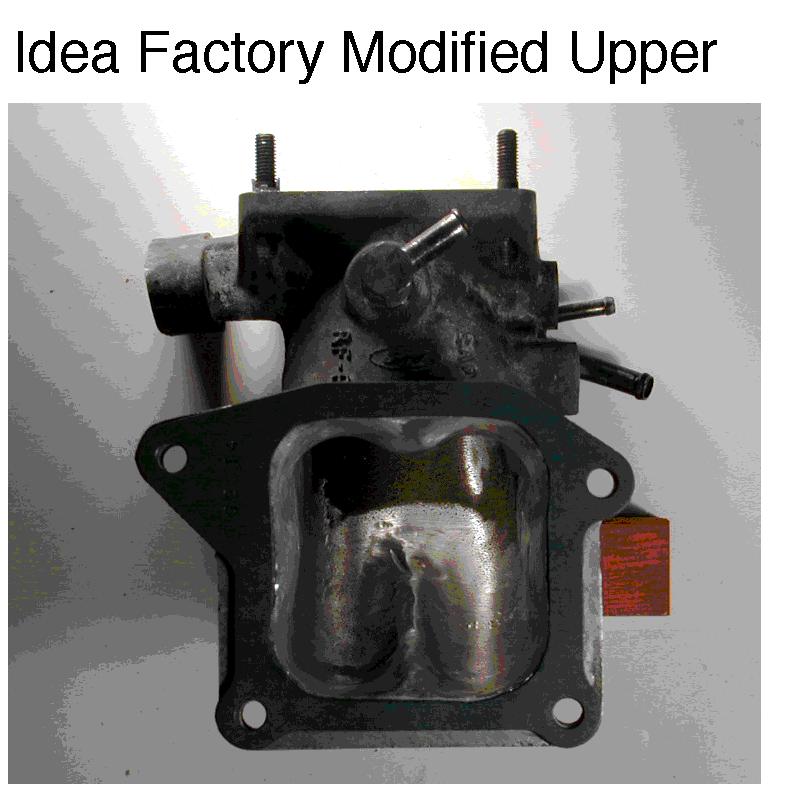
Gutting the upper intake REALLY WORKS. IMHO, the only change from
1500 to 6300 is more power. In the current state of modifications,
my XR would pull strong to 5500 then roll off. I thought that
it was due to running lean, as the O2 meter shows. Upon porting
the upper, major improvement; as big as putting on a hi-flow exhaust.
Big improvement.
Upper: The gutting took about 4 hours (1 hour R&R,
3 hours porting). The trick in cutting out the web is a SAWZALL
with a 8" metal cutting blade. You'll need a 24 tooth NEW
hack saw blade to hand cut the last part of one of the webs. You'll
also need a die grinder with a BIG AGRESSIVE carbide to smooth
the carnage. A sanding roll will further smooth the cutting marks.
Two of the webs can be cut flat with the wall, two need to stay
about 3/8" since the outside of the casting has an indent.
Don't port thru !!!
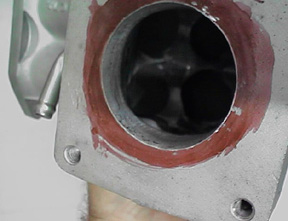
Lower: The lower is much different. If you have or will gut the upper, radically open the top ports and radius them. The finished look should be a square with 4 ports. On the head flange open to the size of the head. You'll need to weld up the "dent" under the #2 and #3 injector to really open the port. You'll also need to weld up the dent on the bottom of #2 and #3 to open that side. The part where #2 and #3 go around the water jacket also needs extensive opening. After working an hour or so, try passing a golf ball. It is a good tool to measure port size. Remember, you want constant size throughout the part. In addition to the welding, plan to spend 3-4 hours porting (radical carbide in Makita die grinder, NO DREMELS they are way to small) in addition to making a template to indicate the size of the ports in the head.
The prefered method is to weld up the injector #2 and #3 bosses before porting.

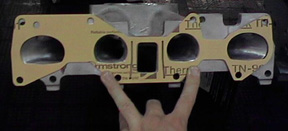
This upper intake has NOT been gutted.
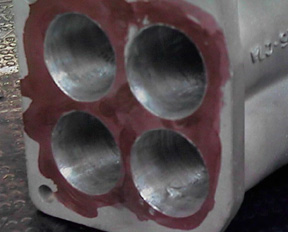
This Intake has been gutted.