
The headlamps installed by FORD for sale in the US were different than those sold in the rest of the world. This page describes my version of the changeover to the "Euro" style headlamps. Note that the "Euro" headlamps are available in both RIGHT SIDE DRIVE and LEFT SIDE DRIVE, depending of course which market the Sierra was initially sold in. The only difference is the GLASS lens (available from BAT).
Part numbers for Euro style headlamps: (right hand drive)
| LEFT |
|
|
| RIGHT |
|
|
Here in "little lovely Denmark" we can get all the headlamps we need both for Scorpio and Sierra (Xr4Ti) from day to day. Price about 100$ each lamp (not FoMoCo).
I can come up with a web-site and probably how to order if anyone would like it.
Eddie C.J. (Denmark) ecj@SH.AAS.DK
Bulbs:
| Function |
|
|
|
|
|
|
|
|
| Driving |
|
|
|
Alternate Bulbs available:
In my opinion the higher wattage aren't worth any extra attention in the Euro headlamps except maybe for Racing at night.
|
|
|
|
|
|
|
|
|
|
|
|
|
|
|
|||
|
|
|
|||
|
|
|
Wiring Changes:
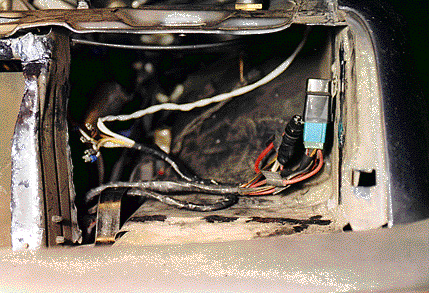
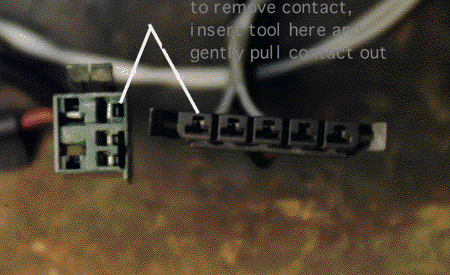
The wiring harness is different between the US and Euro. There is several ways to hook the lights up. The US lights have HI/LO and front white lights. The Euro have HI/LO, driving lights, and front white lights. The Euro lights are wired internally such that they should not be installed directly or the XR wiring will burn out. This is due to the added power for the driving light (50 watts each) which are wired with the Hi beams. I chose to hook up the Euro Hi/Lo bulb to the XR harness and the Driving Lamp is powered off a relay switched by the Hi beam. This method will keep the XR warning module indicator functional for the Hi/Lo headlamp AND front white light in addition to powering the Driving Light without damage to the XR harness. The key is to use an XR Air Conditioning Fan Relay (or equivalent).
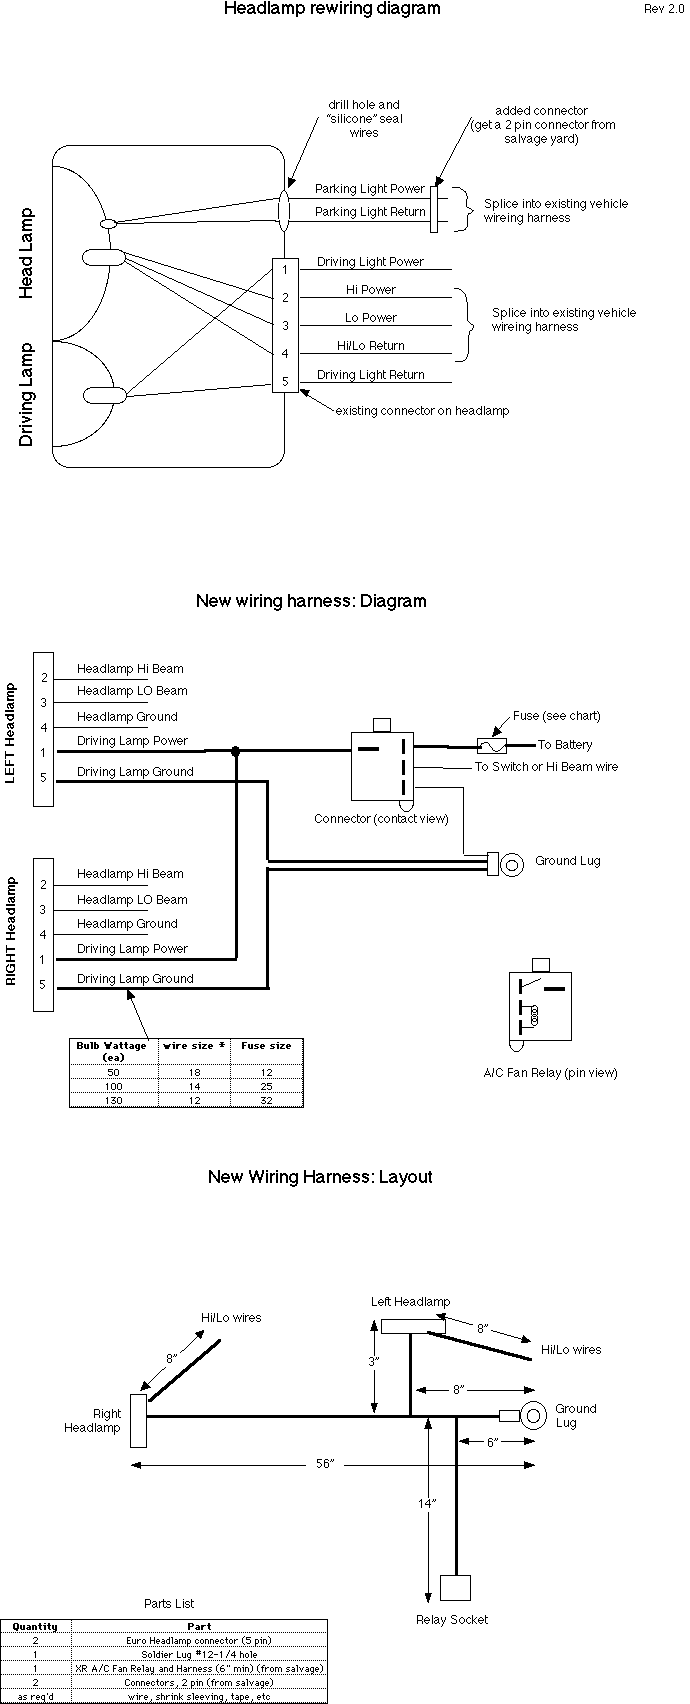
Sheetmetal Changes:
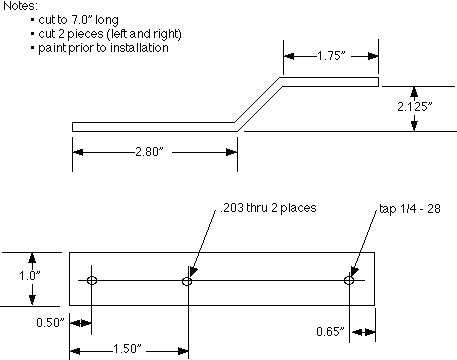
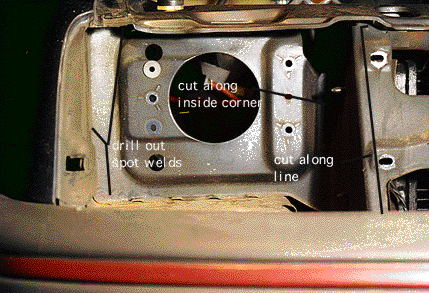
The Euro lights are as big as the US headlamp AND the white light combined. The Euro light is also deeper with different attachment points. Basically there are 2 choices: cut a big hole in the mounting panel OR cut out the panel and weld in a new one. I went for the "cut a big hole method".
Outline of changes:
